Tyre Levers and Motorcycle Tyre Levers
The main tool used in tyre mounting and demounting is a tyre lever. The tyre lever comes in different lengths for different tyre and wheel combinations. Shorter levers, known as motorcycle tyre levers are normally are around 10” in length and shaped a little like a big screw driver. Tyre Levers from around 12” through to 24” would be classed as car tyre levers and are the most common in passenger tyre fitting. They are used to manipulate the tyre bead on to the mounting head and to apply pressure to the tyre while mounting or demounting. Commercial tyre levers are also available in much larger lengths and often with special fitments on the ends to aid in commercial fitting.
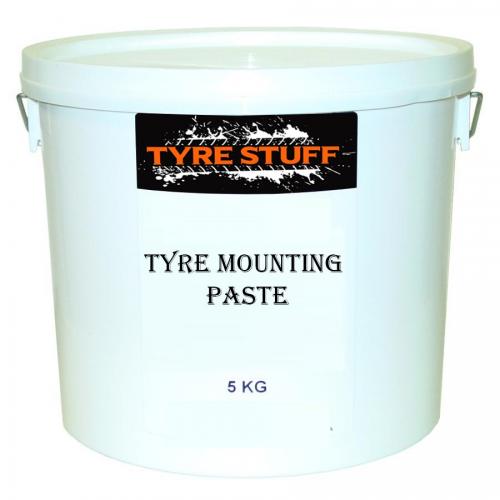
Tyre fitting lubricant or Tyre Soap
One of the most important part of mounting or demounting tyres it lubrication. You are trying to fit a steel bead onto a rim with very little leeway, so whenever working on a tyre, use plenty of lubrication. The most common lubrication is Tyre Mounting paste or Tyre Soap. It is a semi hard paste that is applied to the rim and the bead with a brush. Tyre soap is also available in black, for less obvious marks. There is also tyre wax which is a waxy substance doing the same thing as well as Tyre Lube, a liquid form. Which tyre lubricant you use is mainly down to preference but please give us a call if you are unsure.
Tyre Valve tool
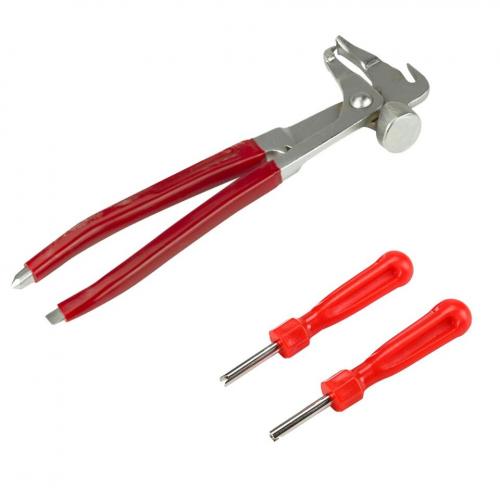
The tubeless valve tool allows you to remove and replace the valve core, the integral part of the valve which keeps the air in the tyre. The plastic handled valve core key is very common but there is also a 4 way tyre tool which allows you to remove and replace the valve core but also grip the outside of the valve, re-tap the thread and pull the valve through the rim hole.
Valve knife or Skiving Knife
Valve knives are used for cutting out an old tubeless valve. You should replace the tubeless valve every time you change a tyre. Simply cut through he stem close to the bottom to remove the old valve before putting the new one in.
Other tyre fitting tools
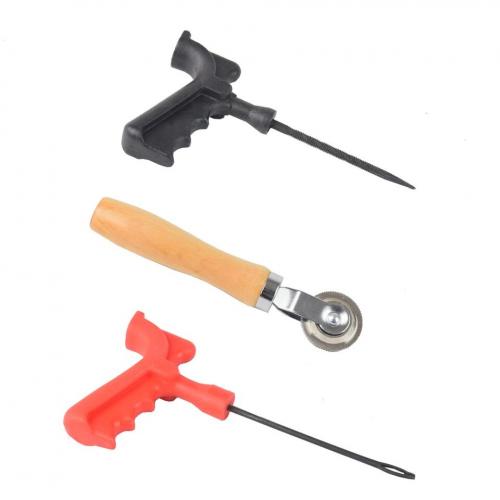
There are other tyre fitting tools that are required or advised. Tyre valve mounters, wheel weight plyers, self-adhesive weight removers are all common items that are used. There are also more specific tools such as bead wedges, rim protectors and specialist tyre lubes. If there is something you can’t find give our team a call and we will be happy to help.
Tyre Repair tools and Accessories.
Tyre Repair is a completely different operation to just changing the tyre. You will of course have to remove the tyre in order to carry out the repair so as well as the above tools, you will require some additional tools, chemicals and materials to carry out the job.
A full range of our Tyre Repair Materials and chemicals can be found here;
Repair Materials and Chemicals
Tyre Puncture repair procedure
NOTE: All the information on this page is for guidance only and on what is considered a minor repair to a radial construction tyre fitted to a car and van according to British standards. Major repairs such a repairs to sidewall damage are also governed by the same British standard but will need to be sent away to a specialist major repairer. If you are not an experienced tyre fitter, do not attempt this procedure.
Step 1
Remove the tyre from the wheel thoroughly inspect it both internally and externally for signs of damage from being run flat or other issues. If any serious tyre damage is present, then the repair should not continue and the customer advised that a replacement tyre is needed.
Step 2
Locate and mark the damage using tyre chalk. Use a tyre prodder or similar tool to take out any foreign object still within the tyre. A repair site should be no larger than 6mm
Step 3
Prepare the injury from the tyre inside of the tyre using a 6mm carbide cutter. Drill the puncture through completely.
Step 4
Repeat the process, but from the outside of the tyre inwards. The hole is prepared when the carbide cutter moves freely through the hole.
Step 5
Use buffing solution to clean an area around 20mm larger than the area the patch will cover. Make sure the area is thoroughly cleaned and that no residues are left.
Step 6
Hold the patch or plug in position on the centre of the injury and mark its outline on the inner liner of the tyre with marker or chalk
Step 7
Using a air powered buffer tool, buff the inner liner to roughly 5mm beyond the marked area using an appropriate buffing rasp. There should be no raised areas left after this process and the finish should be a sort of suede feel
Step 8
Clean the area again, removing all tyre particles including, buffed rubber and fluffed cords.
Step 9
Apply tyre glue / vulcanising solution to the puncture channel and buffed area. Ensure the area is covered and the channel is filled using a spiral cement tool.
Step 10
Insert the tyre plug / combi plug into the puncture channel. Pull the brass end of the combination tyre repair patch and plug outwards, through the tread until the entire patch is flush with the inside of the tyre.
Step 11
Secure the reverse of the patch using a corrugated stitch roller. Roll from the centre of the patch outwards to remove any air bubbles, making sure the entire patch has solid contact with the buffed inner liner.
Step 12
Seal the combination tyre repair patch and plug base and buffed area still exposed with an inner liner sealant. Cut the stem of the combination tyre repair patch and plug flush with the remaining tread of the tyre.
Wait 10 minutes before mounting the tyre back onto the wheel and reflating to the correct pressure.


